Pole barns have become a popular choice for homeowners and businesses alike due to their affordability, flexibility, and durability. These structures are used for various purposes, including storage, workshops, and agricultural needs. The process of constructing a pole barn involves several important steps to ensure its longevity and stability. Understanding the key stages of building a durable pole barn can help you achieve a sturdy and long-lasting structure.
Step 1: Planning and Design
Before starting construction, proper planning and design are crucial. This stage involves deciding on the size, shape, and purpose of your pole barn. Will it be used for storing equipment, livestock, or as a workshop? The intended use will help determine the size of the barn and the materials needed.
A well-designed pole barn can enhance its strength and overall functionality. It is important to work with a pole barn building expert who can assist in designing the structure, ensuring it meets local building codes and regulations.
Step 2: Preparing the Site
Once the design is finalized, the next step is preparing the site. The location should be level and free of any obstructions, such as large rocks or trees. Clearing the area ensures that the foundation can be properly laid, and the barn will stand on a solid, stable surface.
In some cases, soil testing may be necessary to determine the best foundation method. A building expert will know how to assess the ground and recommend the best approach for your location.
Step 3: Installing the Posts
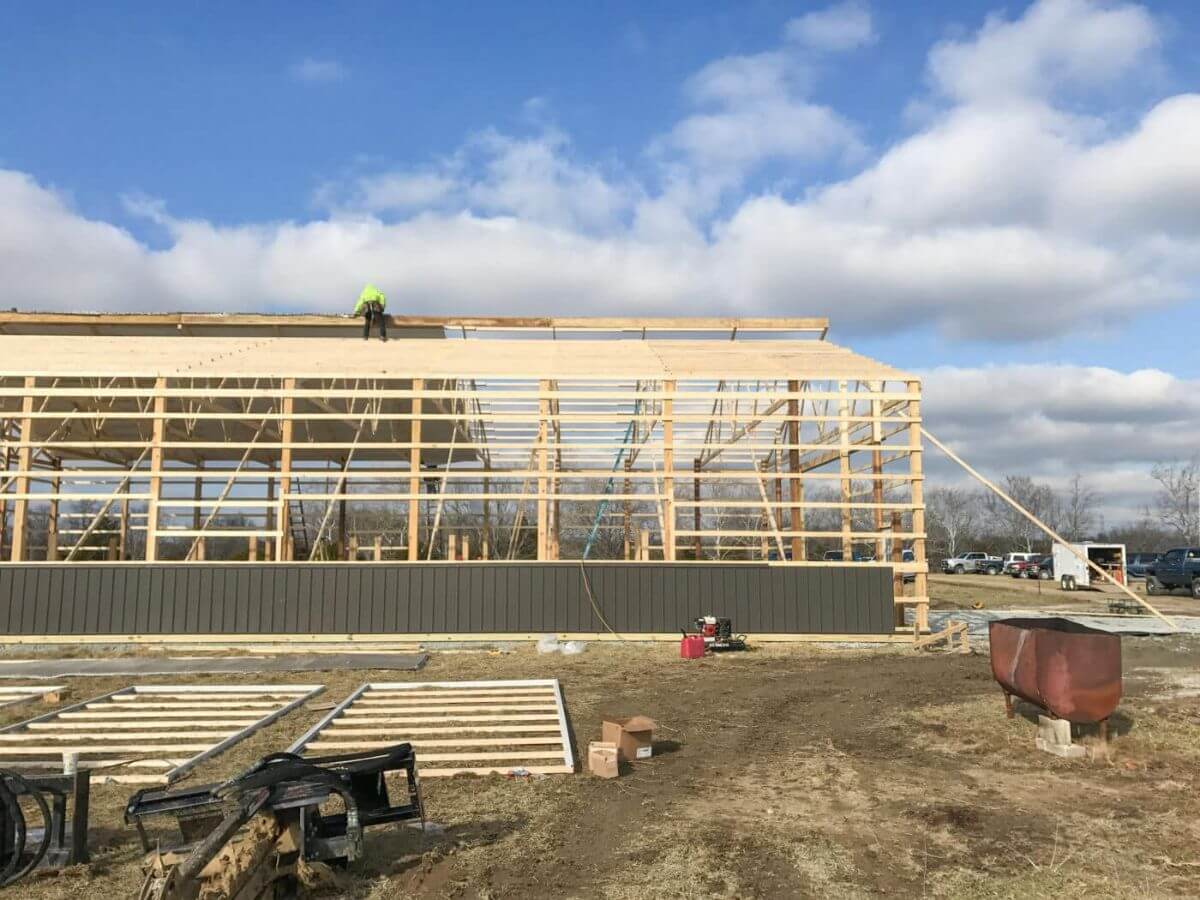
One of the main features of a pole barn is the use of vertical posts to support the structure. These posts are typically made of treated wood or metal and are buried deep in the ground. The installation process involves digging holes for the posts, ensuring they are spaced correctly according to the barn’s design.
The posts should be set in concrete to provide stability. The depth and size of the holes depend on the size of the barn and local soil conditions. This step is vital to ensuring the strength and durability of the structure.
Step 4: Attaching Horizontal Beams
After the posts are securely installed, horizontal beams, also known as girts, are added. These beams connect the posts and provide additional support for the roof and walls. The placement of the girts is crucial for the stability of the structure.
The choice of materials for the beams depends on the design and budget. Some pole barns use treated wood, while others may opt for metal beams for added strength.
Step 5: Building the Roof Structure
The roof of a pole barn is essential for protecting the contents inside and providing structural integrity. Depending on the design, the roof can be gabled, gambrel, or lean-to. Roof trusses are installed on top of the horizontal beams to create the framework for the roof.
Once the trusses are in place, roofing materials such as metal panels or shingles are added. Metal roofing is often preferred for its durability and resistance to weather conditions, but other materials may be used depending on the aesthetic preferences and budget.
Step 6: Installing the Walls
The walls of a pole barn can be constructed from various materials, including wood, metal panels, or a combination of both. The choice of material largely depends on the intended use of the barn.
The walls are typically attached to the horizontal beams, providing additional strength to the structure. If windows or doors are part of the design, they are installed at this stage. Proper insulation can also be added if the barn is intended for use as a workshop or living space.
Step 7: Adding Doors and Windows
Doors and windows are essential for access and ventilation. The type of doors installed depends on the purpose of the barn. Roll-up doors, sliding doors, or overhead doors are commonly used in pole barns. For barns used for agricultural purposes, large doors may be necessary for equipment storage.
Windows are optional but provide natural light and ventilation, which can be important in barns that will be used for workspaces or livestock. Proper placement of windows and doors ensures the functionality and accessibility of the barn.
Step 8: Finishing Touches
Once the main structure of the pole barn is in place, the finishing touches can be added. This includes painting the exterior, sealing any gaps, and ensuring the barn is waterproof. Electrical wiring, lighting, and plumbing may also be installed if the barn will be used for more than just storage.
Final Thoughts
Constructing a durable pole barn involves careful planning, attention to detail, and quality materials. From designing the structure to completing the finishing touches, each step plays a crucial role in the overall strength and functionality of the barn. If you’re considering building a pole barn, it’s essential to work with a pole barn building expert who can guide you through the process and ensure the final result meets your needs. Contact a trusted professional today to begin your pole barn construction journey and create a building that will stand the test of time.

